
Before Uploading
- Each image is a single asset which can have 'Alternate' files associated with it.
- Resize your originals to be max 1920px width or height (depending on landscape or portrait orientation).
- Save as .jpg, set to 72dpi and reduce the 'Quality' slider in photoshop to 7.
- Note that while the original is .jpg, 'Alternate' images should be .webp.
- ResourceSpace doesn't allow a thumbnail 'preview' for .webp yet.
- Note that while the original is .jpg, 'Alternate' images should be .webp.
- Use naming convention as listed below.
- 'Alternates' should be saved as .webp.
- Image compression: Lossy, 50
- The Washburn website generally uses three sizes of images for 'Alternate' files.
- Headers / Heros which are 1920px x 767px (appx. 200kb or less)
- Naming convention: append '_header'
- Thumbnails which are 400px x 400px (appx. < 100 kb)
- Naming convention: append '_thumb'
- Home Page Slides 1920px x 1091px (appx. 200kb)
- Naming convention: append '_slide'
- Headers / Heros which are 1920px x 767px (appx. 200kb or less)
Naming Conventions
We use naming conventions for all web images so that we can track them back to the photographer and also to know how the image has been cropped at a glance.
The photographer should keep the original digital number associated with the file so that it matches what is in their personal archive.- Convention: OriginalFileName-description-photographerInitials_fileSizeType.webp
- Example: DSC_2234-wufest-students-ED_header.webp
- File size/types:
- '_thumb'
- '_header'
- '_slide'
- '_web' - this is used for the uncropped original
Uploading Images
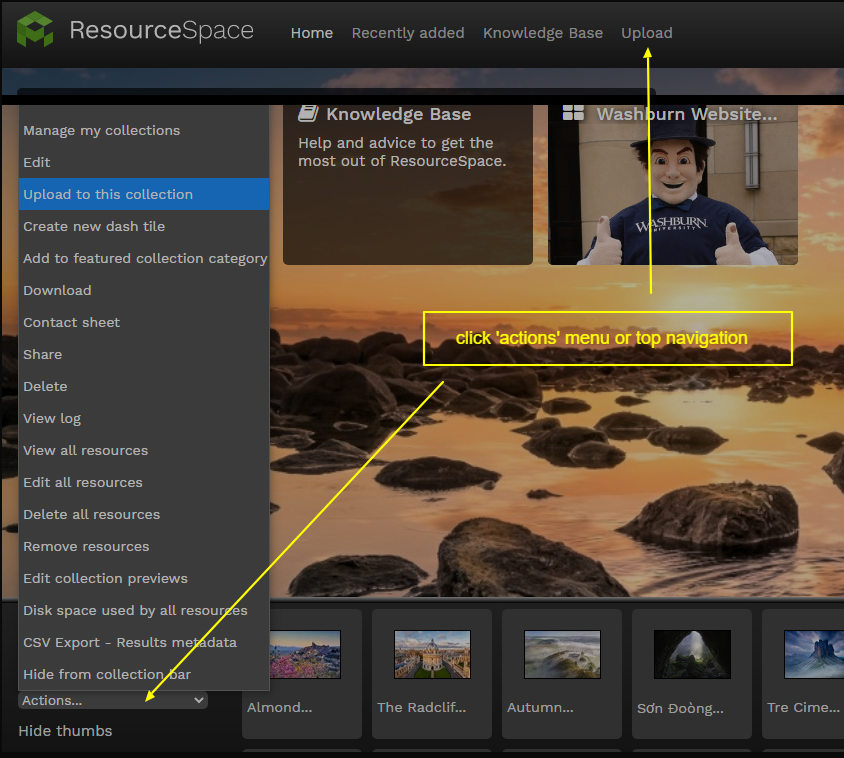
- Upload images by clicking 'Upload' in the top navigation or by clicking 'Upload to this collection' in the 'Actions' menu located in the Collections bar.
- Clicking 'Upload' will take you to a screen where you can apply Meta Data to your asset or batch of assets.
Adding Meta Data
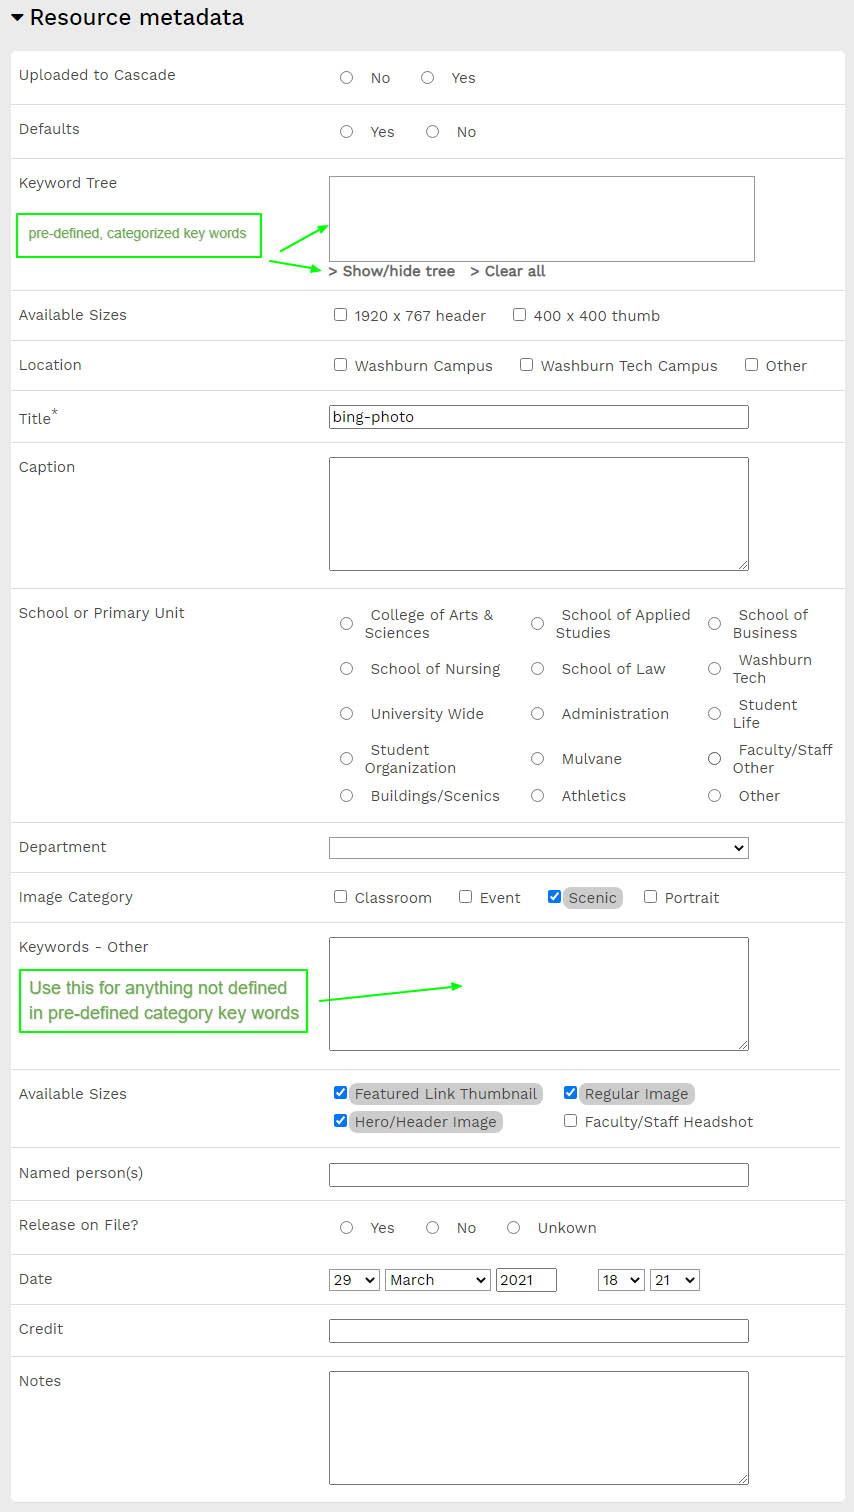
- Meta Data is the unseen, detailed data behind all of the assets in the D.A.M.
- In ResourceSpace there are customized, "Pre-Defined" Meta Data Fields.
- These fields take the form of check boxes, drop down menus, and radio buttons.
- Use these before typing in any unique key words.
- Click the thumbnail to the left to see the main Meta Data options for assets.
- If you need to apply very granular Key Words to an asset, there is a location to type in unique words noted in the screen capture.
- NOTE : If you need to add any "Pre-Defined" Meta Data, please contact an administrator.
- Click 'Next' when Meta Data is selected.
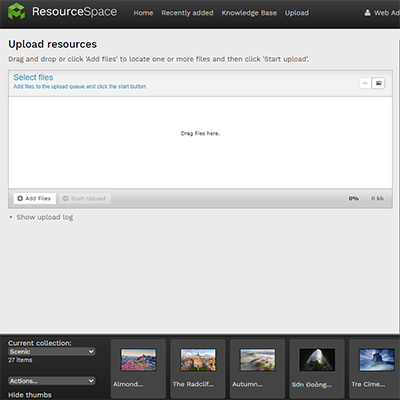
Loading Images
- Images can be loaded once Meta Data is selected.
- Drag/drop image/s into the upload box.
- Click 'start upload.'
Finishing Up Image Meta Data
- If you have loaded a single asset, the upload process is complete and you can now share that resource to the Web Team to be loaded to Cascade.
- If you have batch-loaded images, the final step is to go into each of the images that were loaded and adding any relevant, unique Meta Data to that asset.
- Use the same process of 'Adding Meta Data' that you used before you loaded the images, but this time add any relevant Meta Data unique to that image.
- Proceed to Share Assets, once all images have Meta Data.

Loading Alternate Images
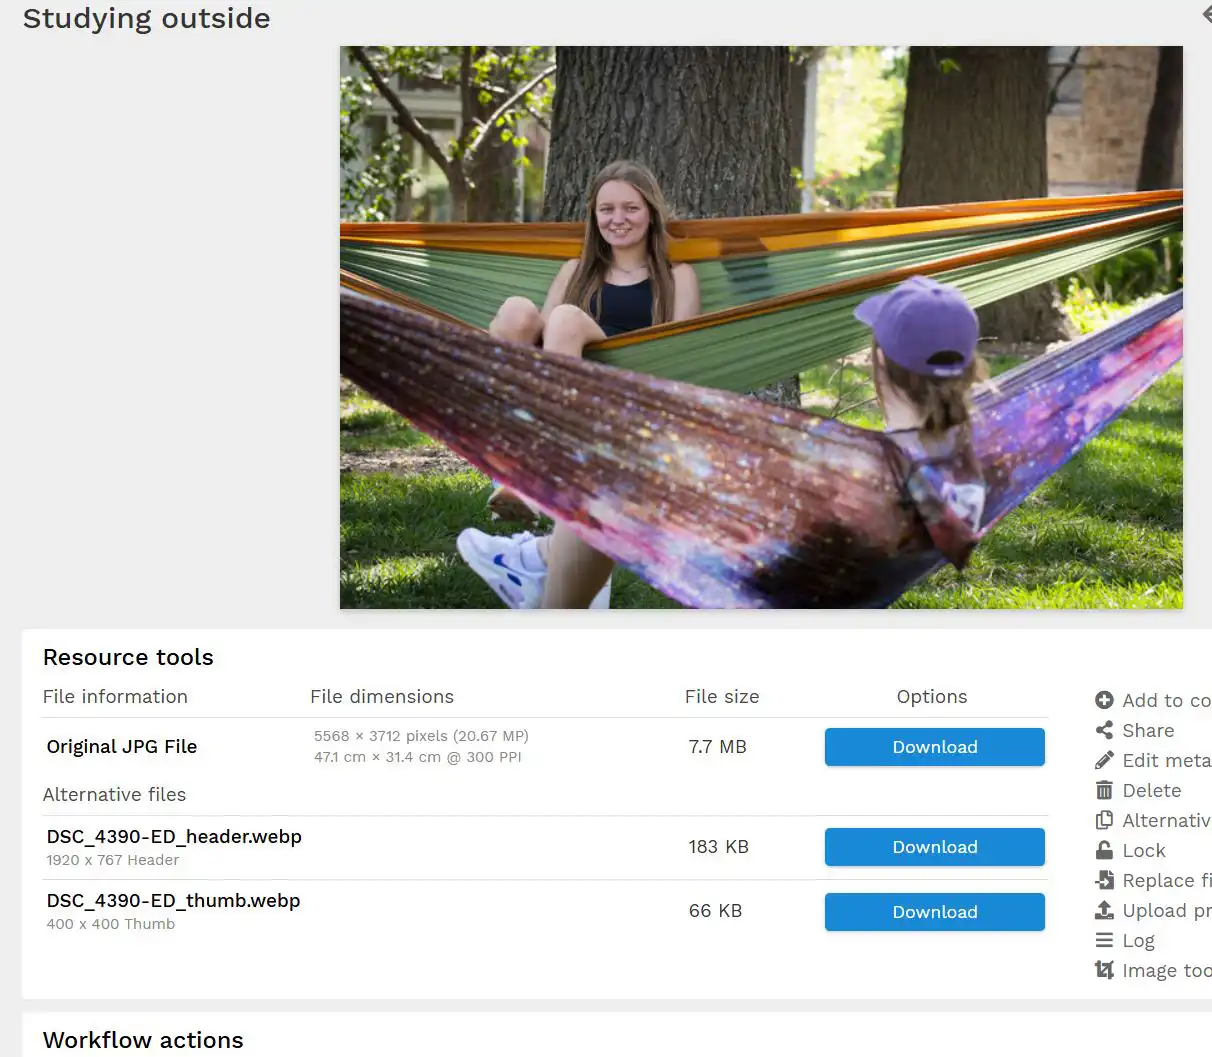
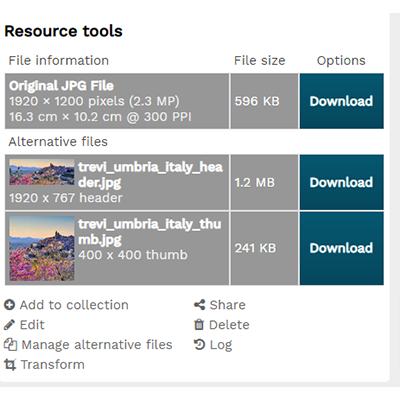
- Click on an original image you've loaded and view details.
- Click on 'Alternative files'.
- In the next window click 'Upload alternative files'.
- In the next window drag-n-drop or choose from your browser all alternate images for the current original.
- Once successfully loaded, go back to the original image editing options.
- Click on 'Alternative files' again.
- Find the new alternative files you've added and edit each one by adding a description that indicates the dimensions. eg. 400 x 400 thumb, or 1920 x 767 header.
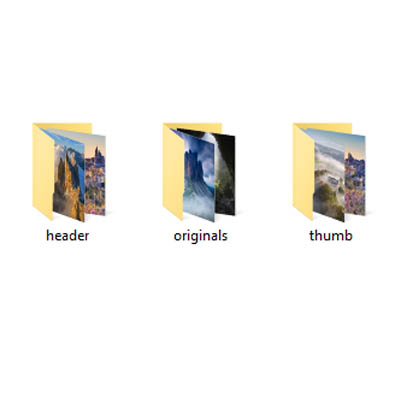
Simultaneous Batch Uploading
- Simultaneous Batch Uploading is possible for Original and Alternate images.
- Headers, Slides and Thumbnails can be loaded as 'Alternate' files at the same time as the original asset all in bulk.
- We don't normally load images this way because of our specific naming conventions. We would have to go back in and edit each alternate file name to '_thumb' , '_header' or '_slide' if we use this method.
- When using this method all file names will be the same but the crops will be in separate folders, eg. folder names would be "original", "headers", "thumbs" or "slides".
- Rename each Alternate file by adding '-alt' to the end of the original file name.
- Windows users can download a utility for file renaming.
- The system will recognize the original file name and will pair it with the identical file name for each file as long as the '-alt' is appended to the end on the alternates.
- Once all are loaded, go back in and edit the alternate file names by removing the '-alt' and adding the appropriate naming convention.